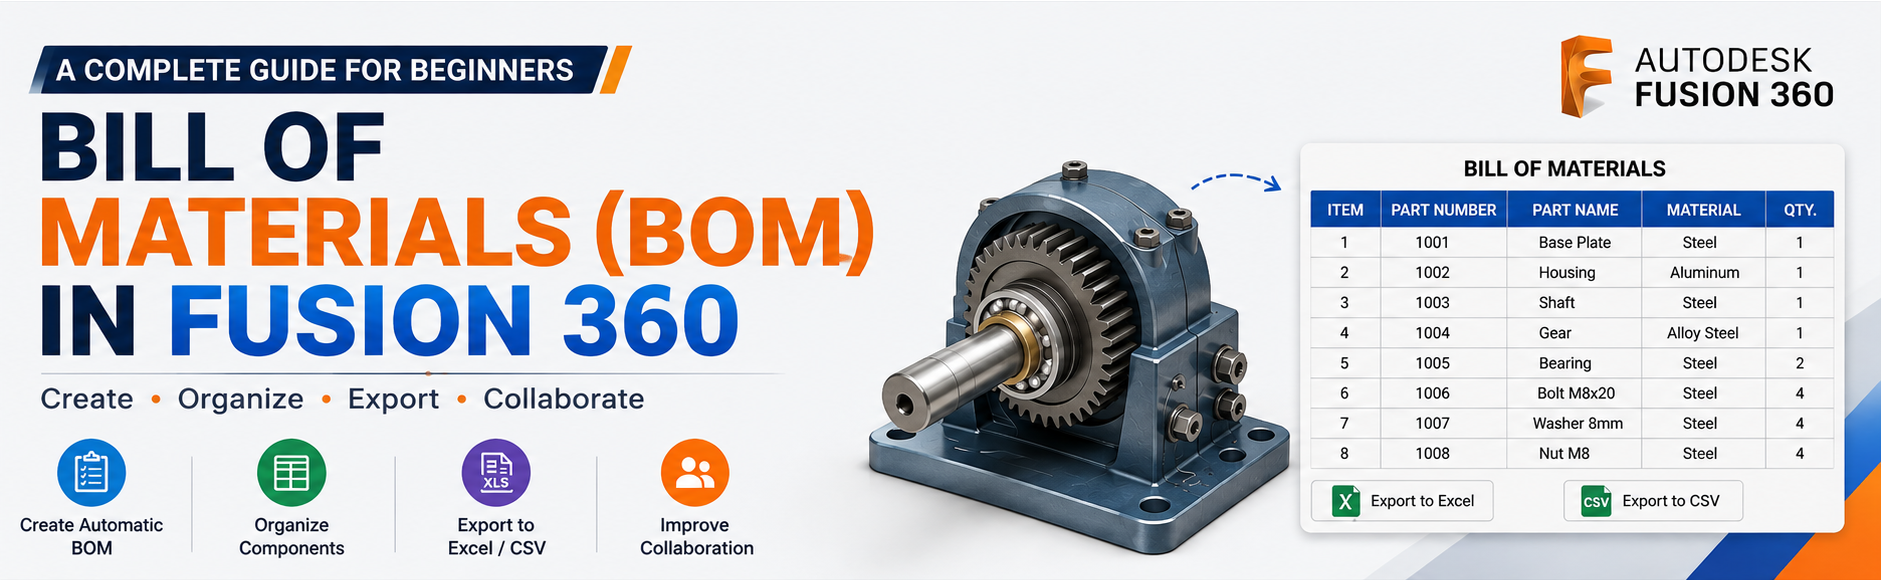
If you're designing assemblies in Autodesk Fusion 360, creating accurate documentation is just as important as building a great 3D model. One of the most valuable tools for engineers, product designers, and manufacturers is the Bill of Materials (BOM).
A well-organized BOM helps ensure that everyone—from designers and procurement teams to manufacturers—works from the same list of components. In this guide, you'll learn what a BOM is, why it matters, and how to use Fusion 360's BOM capabilities effectively.
What is a Bill of Materials (BOM)?
A Bill of Materials (BOM) is a structured list of every component, subassembly, and material required to manufacture a product. It typically contains details such as part numbers, component names, quantities, descriptions, assigned materials, revisions, and lifecycle statuses.
Why is BOM Important?
A BOM offers several advantages throughout the product development process:
- Better Organization: Every component is documented in one central place, making assemblies easier to understand.
- Faster Manufacturing: Production teams know exactly which parts are required and in what exact quantities.
- Improved Collaboration: Designers, purchasers, and engineers work from the same up-to-date data.
- Fewer Errors: Automatic updates reduce the chances of missing or duplicated components.
- Easier Cost Estimation: Knowing every required part simplifies purchasing and budgeting.
BOM Capabilities in Fusion 360
Fusion 360 includes a built-in Bill of Materials feature that generates data directly from your 3D assembly. As your design evolves, the BOM updates automatically. Some core capabilities include:
- Automatic component listing
- Hierarchical assembly structure with expandable subassemblies
- Customizable property columns
- Cross-highlighting between the BOM table and the 3D model
- Export capability to CSV and Excel (XLS) formats
Information Included in a BOM
| Field | Description |
|---|---|
| Item Number | Sequential component number |
| Part Name | Component name |
| Quantity | Number of instances in the assembly |
| Part Number | Unique identifier for sourcing |
| Material | Assigned material properties |
| Description | Optional notes or hardware specifications |
| Revision / Lifecycle | Current design revision state (e.g., Working or Released) |
How to Create a BOM in Fusion 360
- Create Components: Model your product using proper Components, not just Bodies.
- Assemble the Design: Use joints to build the full assembly.
- Open the BOM Tool: Navigate to the Design Workspace and open the Bill of Materials tool.
- Review Components: Verify the automatically generated component hierarchy.
- Customize Columns: Show or hide properties such as Material, Part Number, Description, Quantity, and Revision.
- Export: Export your finalized BOM as a CSV or Excel (XLS) file for purchasing and manufacturing.
Best Practices
- Use Components: Bodies do not store structured assembly information.
- Assign Part Numbers: Unique IDs improve tracking.
- Name Clearly: Replace default names with descriptive titles like
Base PlateorDrive Shaft. - Organize Hierarchies: Group complex assemblies into logical subassemblies.
Common Mistakes to Avoid
- Using Bodies instead of Components
- Forgetting to assign physical materials
- Leaving generic names like
Component1orBody5 - Missing component quantities
- Exporting outdated BOMs before finalizing revisions
Real-World Applications
Fusion 360 BOMs are utilized across various industries, including:
- Mechanical product design & machine assemblies
- Robotics & consumer hardware
- Sheet metal fabrication
- CNC manufacturing & 3D printing projects
Frequently Asked Questions
Master Fusion 360 from Beginner to Professional
Ready to move beyond the basics and master CAD? Learn Fusion 360 through practical, hands-on mechanical engineering projects.
- Parametric Part Modeling
- Advanced Assembly & BOM
- Surface & Sculpt Modeling
- Manufacturing (CAM) & Drawings